


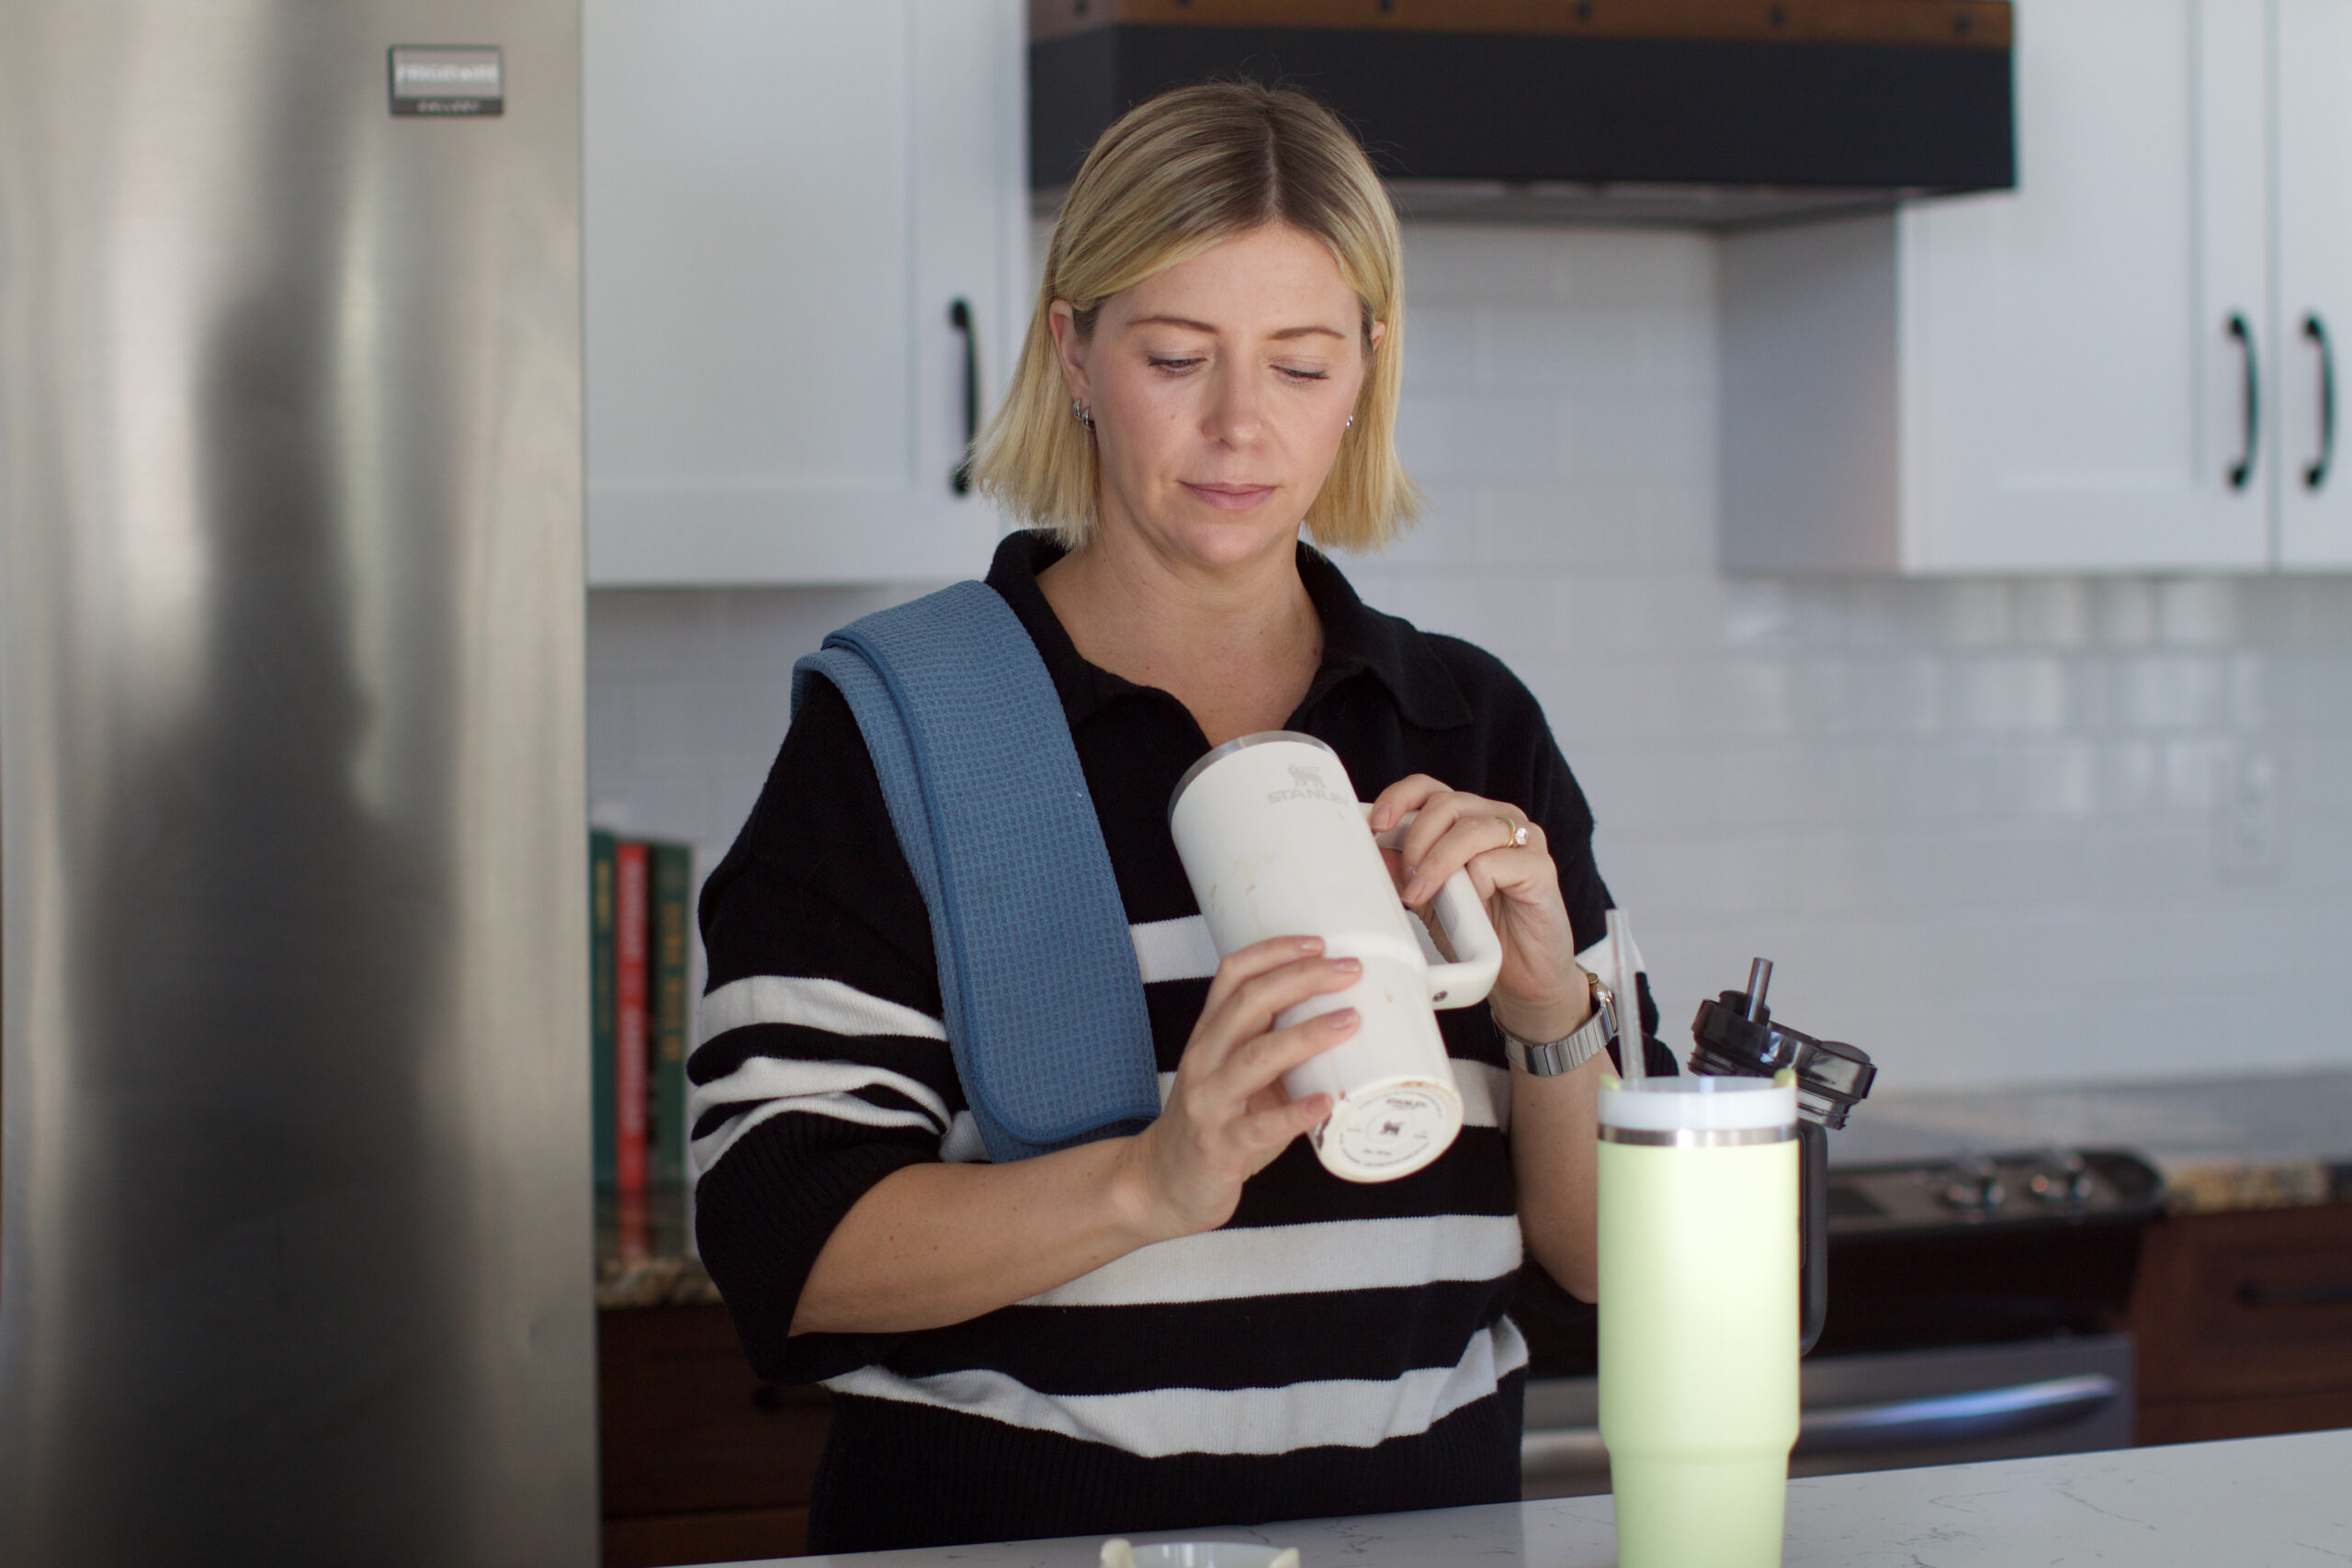
Cleaning Your Stanley Cup (and Other Travel Mugs)
Who would have guessed that a travel cup would become the must-have item for teens, tweens and adults. But here we are. Stanley Quenchers are popular and it’s a great way to stay hydrated.
But no one should be drinking from a dirty or moldy cup. You need to clean them and take care of them.
It’s pretty easy once you know which parts of the lid come apart AND the best part… they are dishwasher safe. So take it apart, toss it in the dishwasher and away you go.
The lid and straw of your Stanley cup is where bacteria and mold can hide and grow. The amount of messages we get asking, “Why clean something that you just use for water?”, is slightly terrifying. You carry this thing with you everywhere and put your mouth on it. It’s exposed to people coughing, dust, pets, dirty hands… you name it.
The cracks and crevices in the lid plus the moist environment from the water make it the perfect environment for mold growth. So yes, you need to wash it. You don’t have to take it fully apart each time you wash it, but it should be done monthly at a minimum. A wash every other day will keep the germs at bay.
How to Take Apart and Wash a Stanley Cup:
Step 1: Remove your lid. Depending on your model you may have a rubber gasket along the top of the threads. Gently pull that off.
Step 2: In one hand, pinch the Flowstate lid (straw holder) edges together and use your other hand to squeeze the prongs on the bottom together. The Flowstate lid will pop right out.

Step 3: Remove the rubber seal from the Flowstate lid (older Stanley’s do not have this piece). To do this, pry the rubber piece from the bottom and gently push it through the hole to the top. Do this on both sides and then pull up on the center stopper on the top.

If there is any mold in your cup or lid, soak them in hot water with a splash of bleach for 15-20 minutes to kill all the germs, mold or bacteria. Give it a scrub then rinse thoroughly.

Step 4: Place the lid pieces and the straw in the utensil rack of your dishwasher so they don’t get lost or tossed around in your dishwasher. Place your cup in your dishwasher, and run a normal cycle. (If you don’t have a dishwasher, hand wash in the sink with hot soapy water.)
ATTENTION: Stanley brand straws are dishwasher safe. But if you have purchased replacement straws they may not be, so do not put those in the dishwasher. They can’t handle the heat.
To ensure your straws are fully cleaned inside and out, use straw cleaning brushes.
If Stanley is not your preferred brand of travel cup, the idea remains the same. Deconstruct your cup (Google your brand for instructions). The small crevices are where the nasty things build up. Be sure to check if yours is dishwasher safe before running it through a dishwasher cycle.
Step 5: Once your wash cycle is complete, ensure each piece is fully dry, then put the pieces back together. Fill with ice water and enjoy.
Happy Hydrating.

When you buy through our links, we may earn a small commission.
Flip-top lid replacement (USA) (Canada)
Replacement lids (USA) (Canada)
Shop all the latest Stanley goods here (USA) (Canada)
Be sure to check out our YouTube channel for more cleaning tips and tricks.


We're big on Instagram.
Follow @GoCleanCo for seriously satisfying videos and top-secret tips. Don’t be shy, come say hi.
gocleanco
484 2,461,462
Creating calm, clean homes.
One room at a time.
*always test a small spot first*
*clean at your own risk*
Recipe:
1 gallon of hot water in a bucket
1 teaspoon of powered tide laundry detergent
Microfibre cloth or a ripped up old towel—you need a cloth with texture to get into the grooves of the paint but do not scrub too hard or scrape because you’ll chip the paint.
Wipe the walls down and let it soften the boogers/food/dog slobber, then repeat. The hot water will help soften the crud, the tide will lift the dirt.
No need to rinse.
Save this post!
Spring Cleaning
Recipe:
1 gallon of hot water in a bucket
1 teaspoon of powered tide laundry detergent
Microfibre cloth or a ripped up old towel—you need a cloth with texture to get into the grooves of the paint but do not scrub too hard or scrape because you’ll chip the paint.
Wipe the walls down and let it soften the boogers/food/dog slobber, then repeat. The hot water will help soften the crud, the tide will lift the dirt.
No need to rinse.
Save this post!
Spring Cleaning ...
My kinda zen 🧘♀️
My kinda zen 🧘♀️ ...
How to get the foggy haze off your bathroom mirrors. You do not have to rinse it! Sound on 📣
How to get the foggy haze off your bathroom mirrors. You do not have to rinse it! Sound on 📣 ...
Cleangasm ™
Who needs a new laser beam @dyson for Spring Cleaning?
Like this post and comment below 👇🏻 (seriously guys, follow the instructions because we have to check)
*not affiliated with Meta or Dyson, all contest rules are on my website housework.com
Cleangasm ™
Who needs a new laser beam @dyson for Spring Cleaning?
Like this post and comment below 👇🏻 (seriously guys, follow the instructions because we have to check)
*not affiliated with Meta or Dyson, all contest rules are on my website housework.com ...
Our Spring Cleaning Challenge starts on Friday, March 7, 2025.
Comment SPRING below and I’ll send you the link to the FREE download. By downloading the Challenge, you are automatically entered into the contest to win a free clean from me and my team!
Full contest rules on my website:
housework.com
Our Spring Cleaning Challenge starts on Friday, March 7, 2025.
Comment SPRING below and I’ll send you the link to the FREE download. By downloading the Challenge, you are automatically entered into the contest to win a free clean from me and my team!
Full contest rules on my website:
housework.com ...
Who needs a new carpet vacuum?! 🙋🏼♀️
Who needs a new carpet vacuum?! 🙋🏼♀️ ...
The gasp I gusped 🧼
The gasp I gusped 🧼 ...
jk vacuuming 3 times a day is worth it ♥️
jk vacuuming 3 times a day is worth it ♥️ ...